
Why We Make Our Products In-House
The case for better products.
Roofs were invented from the beginning of time to keep water and weather out.
That’s what differentiates your home from the great outdoors. It’s a warm and comfortable refuge from the elements.
People typically replace their roofs every 5–15 years. After getting a standard replacement, you might assume you’re safe from leaks, water damage, and “all that jazz” for another 5–15 years to come.
Sadly, and far too often, this is just not the case.
Poor installation can cause new roofs to be just as bad or potentially worse than your previous system, especially if you’re patching or over-roofing a previous job.
Most homeowners choose to skimp on the areas that truly matter (vents, flashings, and all the other hardware), where most of the leakage is coming from, and instead focus all their energies on buying the fanciest shingle possible on the market.
Don’t get us wrong. We like shingles too. We’ve installed probably entire square miles of them. But they’re not the end-all be-all. They are not the savior that’s going to completely waterproof your roof by itself.
Most roofs have poor installation in key places that make the difference to your home, and oftentimes you have leaks in your roof that can cause thousands of dollars of damage…before you even notice them.
Want to notice? You can. Understanding and diagnosing the spot of those leaks is the mark of a high-quality contractor.
Structure of a Leak
The reason your roof could be leaking right now, causing damage to your home and your bank account, without you realizing it, is because of the attic-insulation structure common on almost every single residential home with standard asphalt shingles.
First, you have your shingles.
Underneath, you have your underlayment.
Underneath that, you have plywood or pressboard.
Underneath that, you have struts in the shape of triangles which boards form the shape of your attic.
Inside your attic, it’s standard to have 12 inches of insulation on every surface (that pink fluffy stuff!) In fact, it’s recommended to have the insulation expand as much as possible in the space that it’s in, so as to provide the maximum temperature barrier to your home (hence the name, insulation).
Because you have 12 inches of pink fluffy stuff which happens to be highly absorbent, it can easily absorb a few drips from a bad spot in your roof.
And a few more.
And a few more.
Until, eventually, your entire insulation is quite literally soggied and SOAKED with water in the area in question, and your ceilings start to drip and rot (GROSS!)
Usually, at this point, the homeowner calls the roofer and their insurance and gets it repaired.
How about we diagnose the problem before it gets to that point?
Vents
The single biggest area you’re likely to find leaks is around your vents.
There are three types of them, and they’re all the little things you see sticking up on the otherwise smooth surface of the roof.
First, you have your standard vent. These are typically used for openings above dryers, kitchens, etc. (See below)

Next, your have your pipe flashings. These are typically used to route ductwork and moisture out of your home. (see below)

A pipe Flashing
And finally, you have your attic vents. These are those flat square things you usually see a ton of in a big row:

An attic/flat vent
All three of these vents can be absolutely brutal when it comes to leaks.
Here’s why.
Depending on the materials you use, often attic vents or standard vents are made with plastic, which causes a clean installation at the beginning, but cracks along the sides of the vent within a year of your new roof. With plastic products you’re undoubtedly back to leaks within a year.
With metal, the product is much better, but you can’t always guarantee that the way the vents are installed won’t leak. Oftentimes the sides of standard vents are simply riveted together rather than welded, so they will easily leak around the sides and deliver water straight underneath your roof.
On the standard vents, it’s best to use a completely seamless welded design. MasterCraft custom-welds these in our own machine metal shop. To this day we don’t know of any other roofer in our area that uses anything close to the quality that these provide. These are made with very thick metal compared to those on the market, and they also have completely seamless welds throughout the entire design to ensure no water gets in on the corners, sides, or anywhere else. (see pictures below)

MasterCraft Custom Welded Standard Vent (Left) vs. a typical vent you’ll find from contractor suppliers on the right. The one on the right is metal, medium quality, but still has rivets. We haven’t included plastic, but that’s even worse!!!

Riveted design on the sides of the medium-quality vent. These rivets can break, and water can also leak all around the area where the metal isn’t riveted. There is no glue and no adhesive keeping water out of these areas, and this part of the vent would be sandwiched directly next to your dripping wet shingles (thanks to the Pacific NW climate).
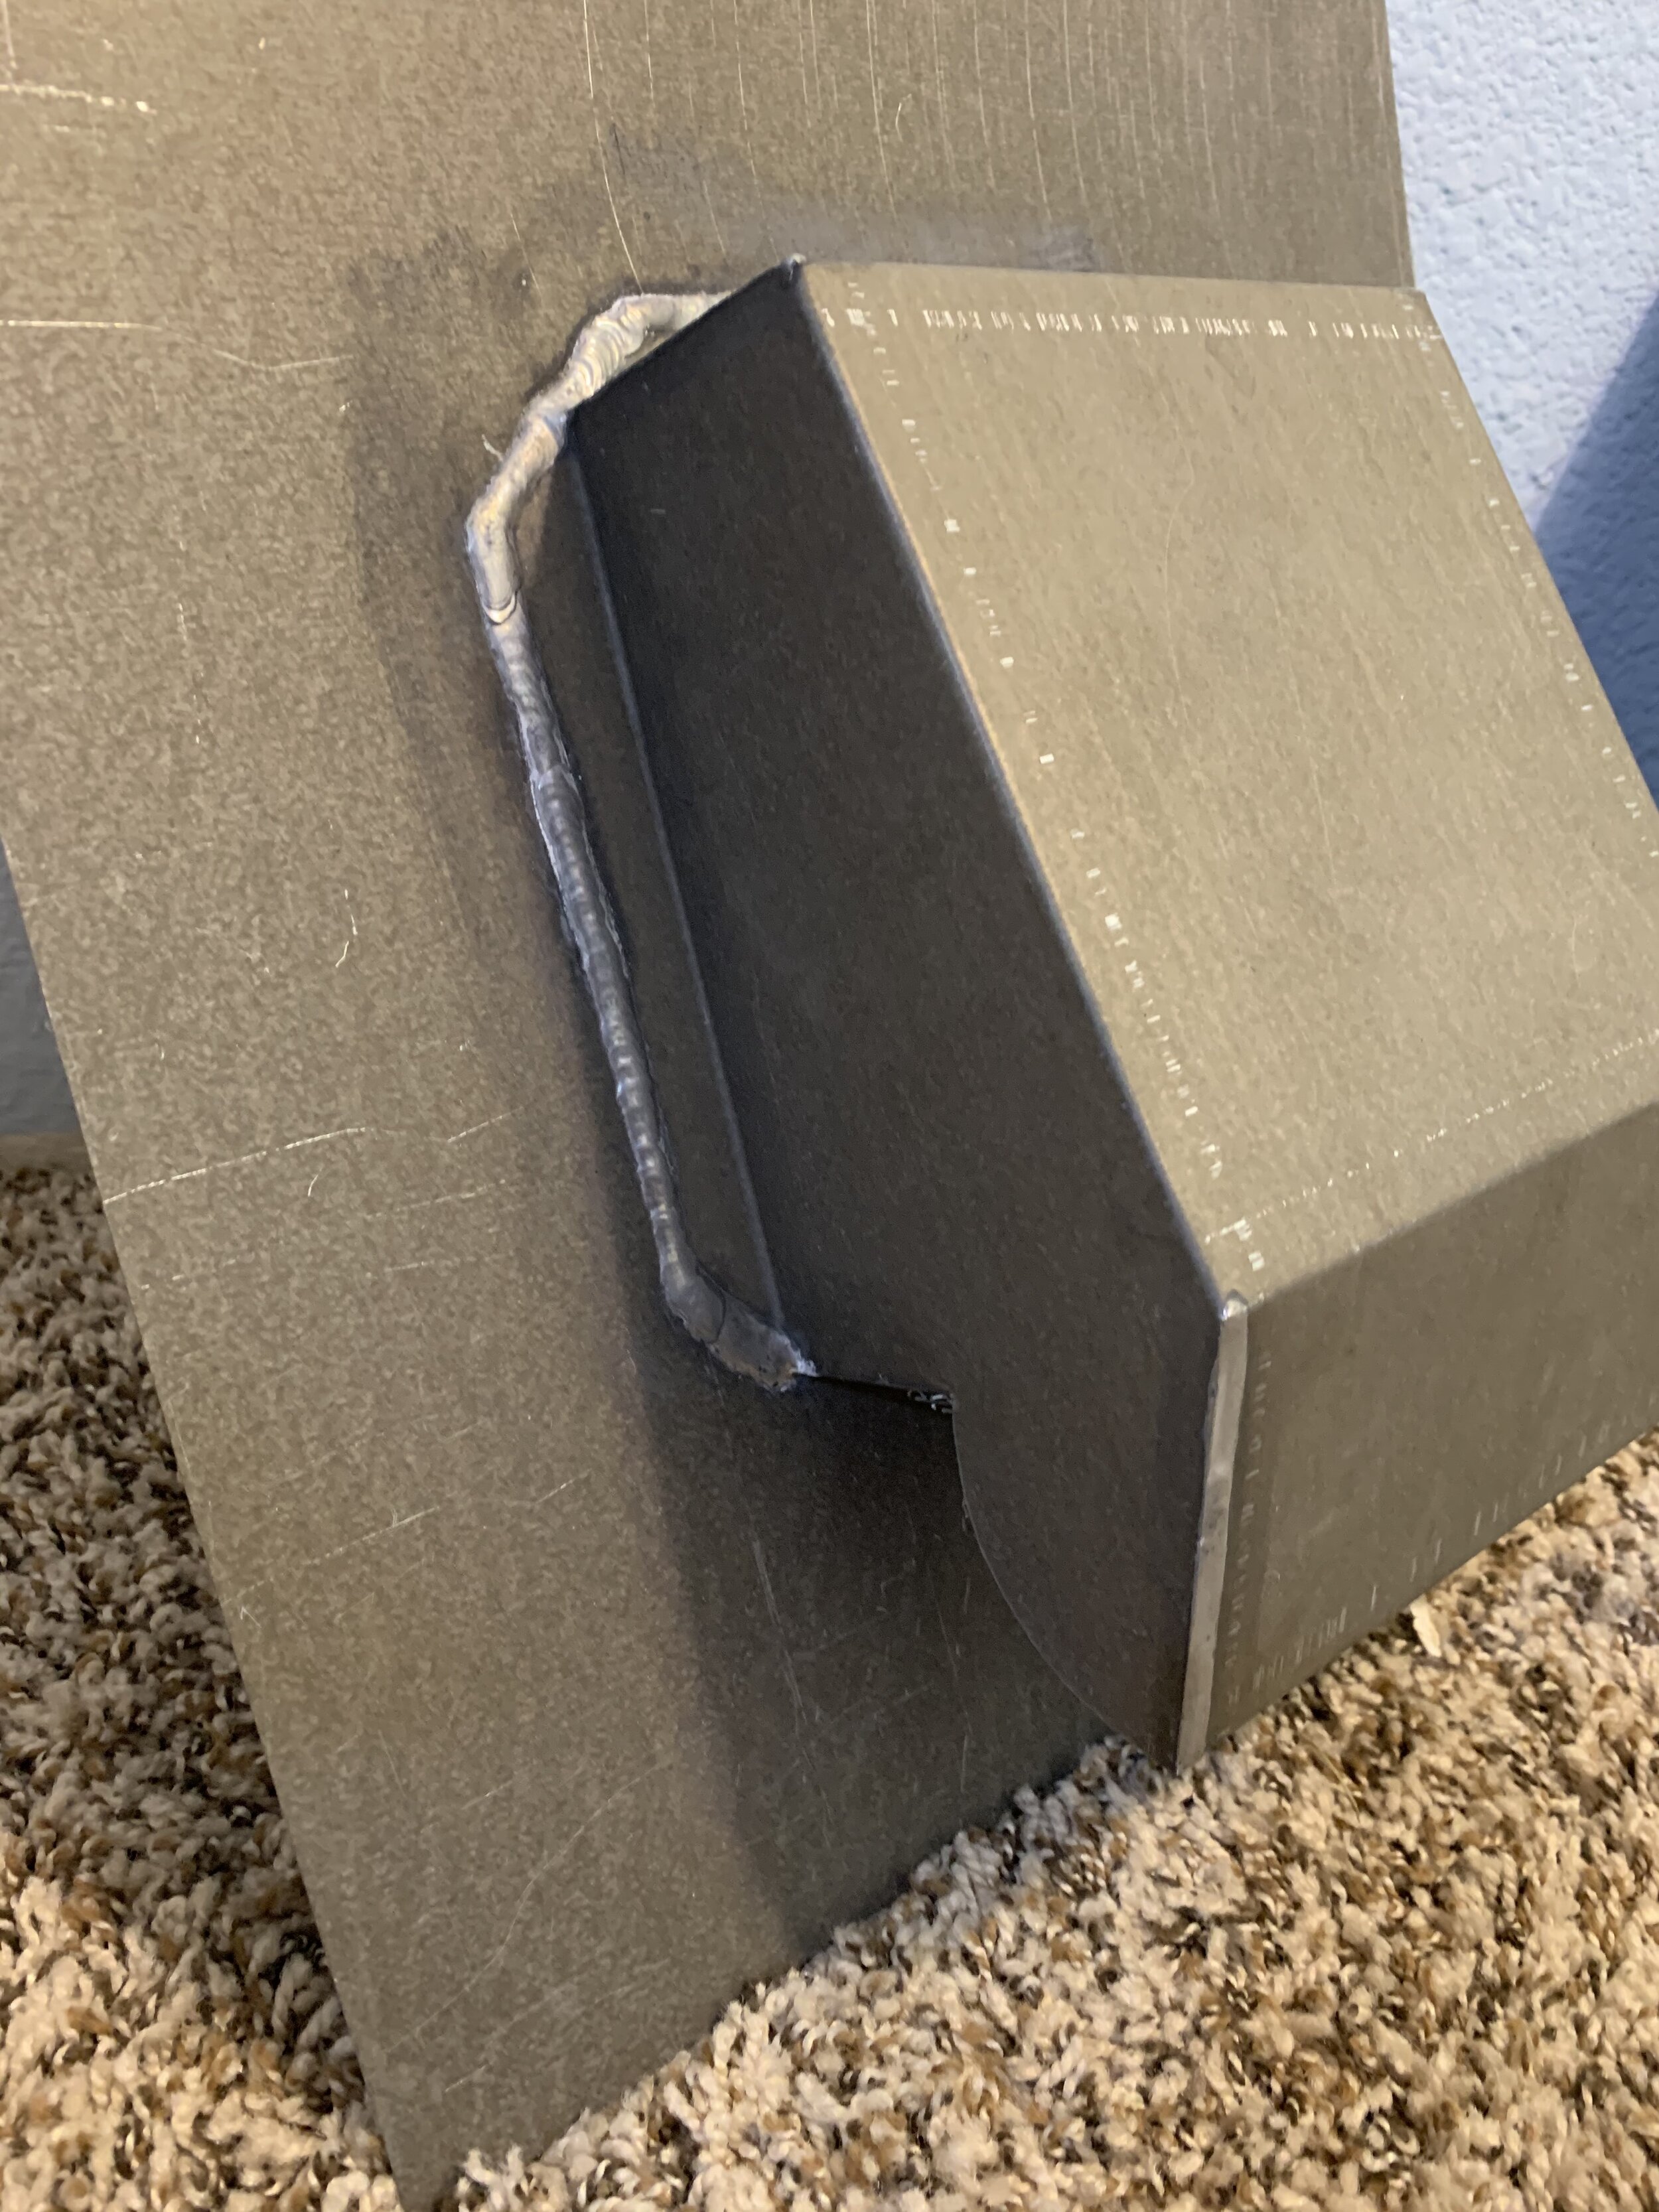
See the heavily welded design on the edges and the robust thick sheet metal on the MasterCraft custom vent. Water is completely impossible to get into the roof and will not do so for decades to come.
Besides just the materials used, you have to consider the installation method as well. Even if you have an MasterCraft custom vent, most contractors will simply nail your vent to the plywood and then pack shingles in around it. Going back to the same problem we experience with the rivet, punctures create…LEAKS!
Regardless of what type or quality MasterCraft uses, we always use a rubber cement paste around the perimeter of the vent (and we manufacture our own with a sufficiently wide enough base to adhere strongly to the roof). This fuses directly to your roofing system, and we usually pack extra waterproof underlayment around the perimeters of your vent to not only keep the vent itself from ever leaking, but the surrounding area.
It seems like a small thing, but the vents in your roofing system cause more leaks than anything else. We’ve been in business for over 13 years, and the rate of customers who experience additional leakage on their roof after-the-fact because of our work is near absolute zero. It takes extra time, extra materials, and extra hours, to put these quality pieces together, but it absolutely works.
Like we say…Premium Materials & Expert Craftsmanship.
Ready for More?
Do you need some repairs/replacement done, or just need an inspection to make sure there aren’t any problems going on in your roof? Call us at (877) 350–1776 for a free estimate and reliable service today!